Features
Powerful features to meet all your needs
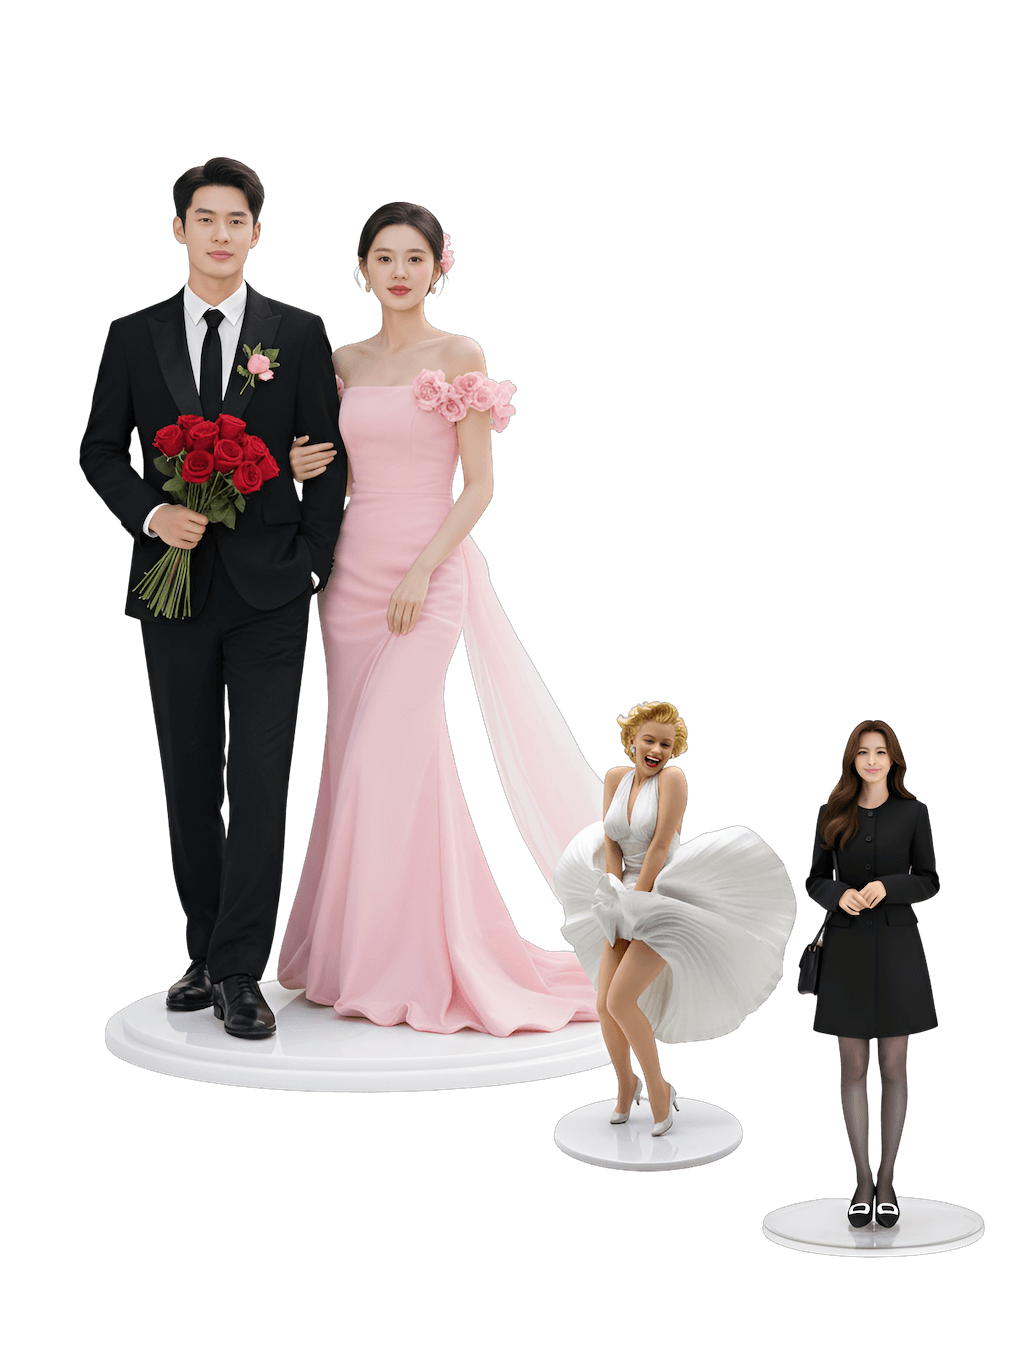
Wide Variety of Figures
Supports real people, pets, anime characters, cars, and many other objects. Everything can be made into a figure.
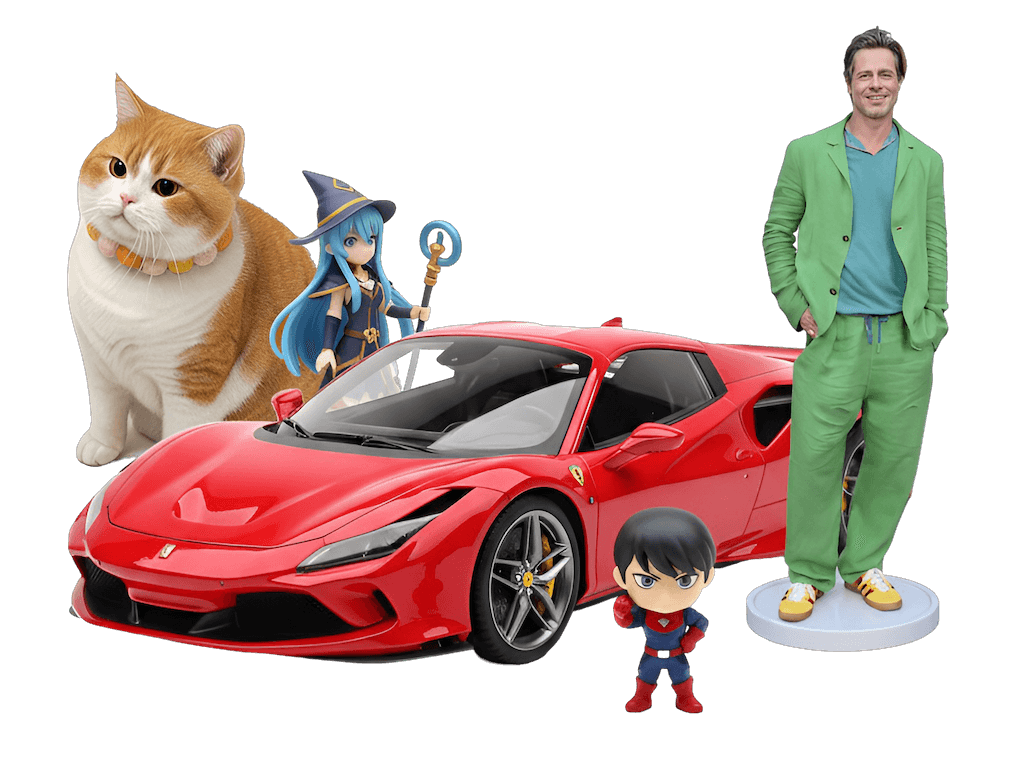
Multiple Styles
Supports realistic, Q-version, anime styles and more to meet different preferences.

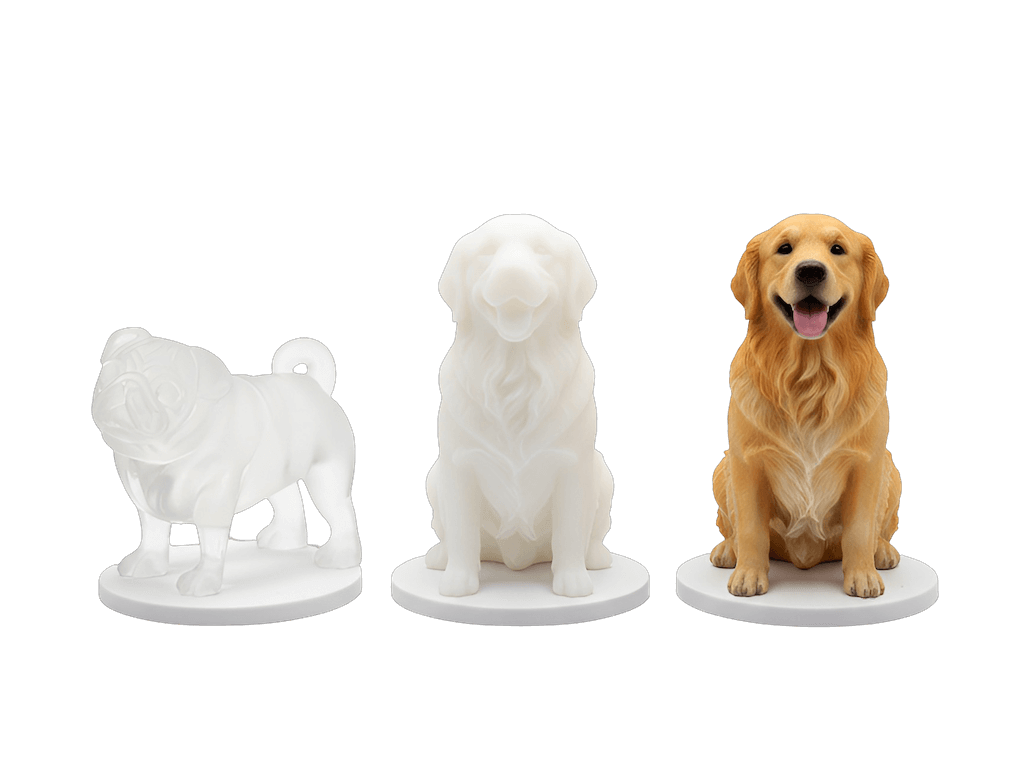
Different Processes
Provides full-color, white, transparent and other printing processes, giving you multiple choices.
Multiple Sizes Available
Five sizes available: 5cm, 10cm, 15cm, 20cm, 30cm. We can make both large and small figures.
Advantages
Why Choose Us
Using industry-leading AI technology to generate the most realistic 3D models for you
Using the most advanced 3D printing equipment to ensure every piece is perfectly presented
The lowest prices, enjoy the highest quality service. Starting from just ¥15 to own a custom figure.
Fastest delivery in 3 days, so you don't have to wait too long
Partners
Trusted Brands


